Showing posts with label 14 - Battle of Mora. Show all posts

Friday, April 13, 2012

Battle of Mora – Move 11

1800-1900 13 August 1813
Table at the start of move 10

All of the Italian infantry are in rout, leaving the guns without protection
The Italian cavalry are on the far right, pinning the Spanish infantry and artillery
The Spanish guerrillas are well positioned to attack the French artillery

Marshal Suchet (Gifted)
5 Command Points
Leave routed infantry and moves to join Severoli
Change corps orders to Retreat

  Guerrillas charge guns

General Severoli (Poor)
8 Command Points
Orders – Retreat
Artillery fire on Spanish gunners (total 6 – no casualties)
Severoli moves to command range of cavalry brigade
Cavalry turn left and form line to threaten guerrilla’s
Artillery limber and move 4” towards cavalry
5th brigade test morale for being in rout (total -3, fail and continue to rout)
6th brigade test morale for being in rout (total -4. fail and continue to rout)
8th brigade test morale for being in rout (total -4, fail and continue to rout)


General O’Donnell (Poor)
9 Command Points
Orders – Attack
Artillery fire on cavalry (total 6 – no casualties)
Gunners manhandle guns 2” towards cavalry
O’Donnell moves to command range of 13th brigade
13th brigade advance 2” in square towards cavalry
O’Donnell moves to command range of guerrilla’s
Guerrilla’s charge limbered artillery
Gunners test morale to evade (total 1 – fail)
Gunners surrender to guerrilla’s

Game Notes
The game ends with all of the Italian corps, except for their cavalry brigade, in rout
The cavalry are too weak to attempt to save the guns, but do cover the retreat

There are no rules for infantry capturing limbered artillery, so we adopted Rule 8 which covers limbered artillery contacted by cavalry.  

Wargame rules can be found at

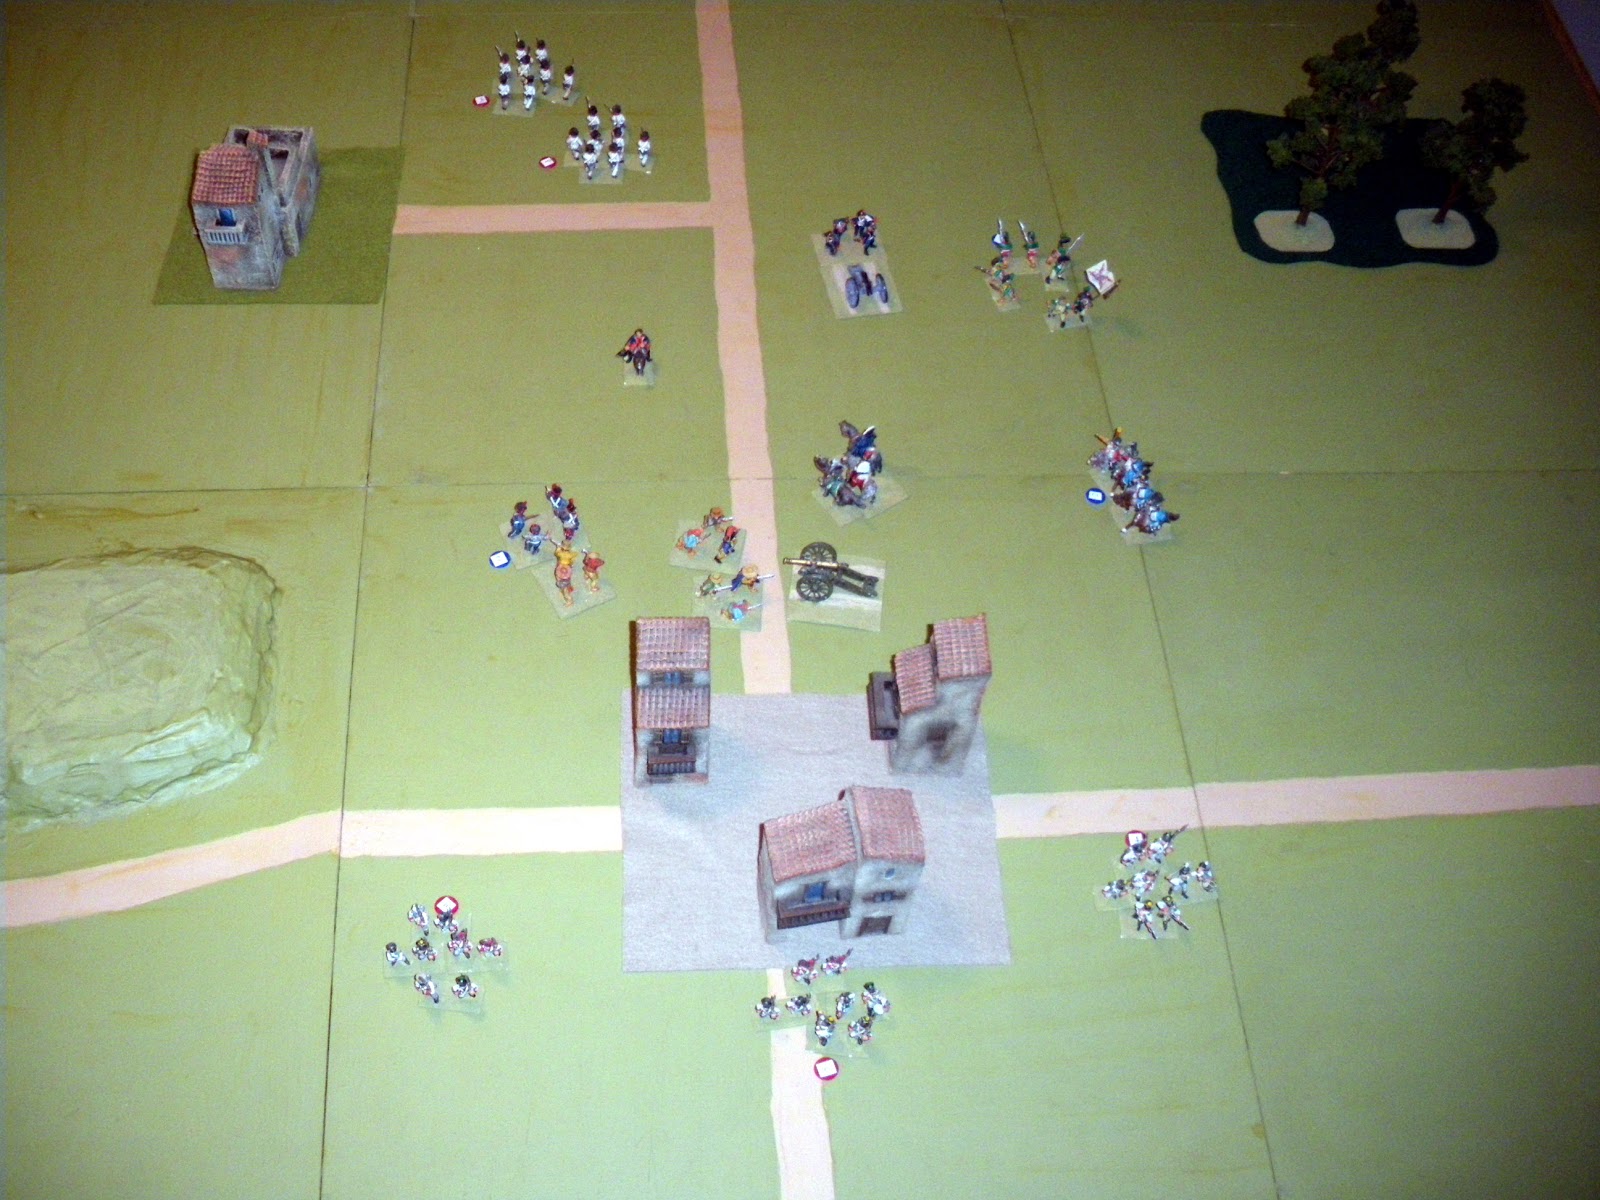
Table at end of game
The Italian gunners have surrendered and are being escorted away by the guerrillas

The Italian cavalry have too many casualties to be able to opportunity charge the guerrillas and save the gunners. 

They are also within range of the Spanish guns and retreat to cover the rout


Game Result

16th Italian corps started the battle with 8 infantry and 2 cavalry casualties
The now have 32 infantry and gunner plus 2 cavalry casualties, plus the loss of their guns

4th Spanish corps have lost 9 infantry and 1 artillery casualties

A very hard fought battle, and another convincing victory for the Spanish.

Thursday, April 12, 2012

Battle of Mora – Move 10

1700-1800 13 August 18
 Table at the start of move 10
Top – Spanish guerrilla’s win infantry melee
Bottom – All Italian infantry brigades have heavy casualties and two are shaken
  16th Italian corps
General Severoli (Poor)
8 Command Points
Orders – Hold
Severoli changes orders to Halt
Artillery fire on Spanish gunners (total 7 – no casualties)
Gunners manhandle guns 2” back towards Mora
Test morale for shaken 6th brigade (total 2 – fail remain shaken)
Test morale for shaken 8th brigade (total 1 – fail remain shaken_

Marshal Suchet (Gifted)
3 Command Points
Too few CP left to change orders
Move to join shaken 6th brigade
4th Spanish corps
General O’Donnell (Poor0
6 Command Points
Orders – Attack
Artillery fire on 6th Italian (total 5 – no casualties)
O’Donnell moves to command range of guerrilla brigade
Guerrilla brigade charges shaken 8th Italian brigade (total 12 – Spanish win)
Italian’s suffer another two casualties and rout
Spanish suffer no casualties but are disordered
French gunners test morale for rout within 4” (total 3 – pass remain formed)
Garrison test morale for rout within 4” (total 0 – fail and join rout)
6th Italian test morale for rout within 4” (total 0 – fail and join rout)

Game Notes
Once one Italian brigade broke and ran the rout soon spread
All of their infantry brigades are running away
The gunners have no protection
The cavalry have two casualties, but must now try to save the guns
The battle would normally finish at this point
However we have to decide whether the guns can be saved
So there will be one more move to decide their fate

Wargame rules can be found at

Wednesday, April 11, 2012

Battle of Mora – Move 9

1600-1700 13 August 1813

  Table at the start of move 9
Top – Two Spanish brigades in rout, a third pinned in square, only guerrilla brigade left
Bottom – Italians continue to hold with heavy casualties and one brigade shaken

  4th Spanish corps
General O’Donnell (Poor)
6 Command Points
Orders – Engage
Artillery fire on 6th Italian brigade (total 7 – no casualties)
O’Donnell changes orders to Attack
16th (guerrilla) brigade charge 8th Italian brigade (total 7 – draw)
Both sides lose one casualty and both are disordered
15th brigade test morale for being in rout (total minus 1 – fail continue to rout)
14th brigade test morale for being in rout (total minus 3 – fail continue to rout)

Marshal Suchet (Gifted)
4 Command Points
Moves to join Severoli
Too few CP left to change orders

  16th Italian corps
General Severoli (Poor)
7 Command Points
Orders – Hold
Artillery fire on Spanish gunners (total 11 – one casualty)
Spanish gunners test morale for first casualty (total 4 – pass remain formed)
8th Italian brigade continue melee with 16th Spanish (Guerrilla)
Spanish have more combat factors and dice (total 9 - limited win)
8th Italian lose two more casualties, retires 4” and are shaken
16th Spanish lose one more casualty, halt and are disordered
6th brigade test morale for four casualties and shaken (total 1 – fail, remain shaken)

  Spanish guerrillas charge Italian infantry
Game Notes
The French CinC arrives on the battlefield

O’Donnell has only one brigade to continue his attack, the guerrilla’s.   They are useless at skirmish and firefight, so he has to order them to charge.  

The Italian brigade already has two casualties, but with superior skirmish and volley fire they are equal to the guerrilla’s.

The first round of melee is a draw. 
The second goes to the Spanish
The Italians now have five casualties and retreat shaken, but still hold
Rule 13 covers infantry hand to hand combat

Wargame rules can be found at

Tuesday, April 10, 2012

Battle of Mora – Move 8

1500-1600 13 August 1813

  Table at the start of move 8

Top – Spanish have one brigade in rout and a second shaken
Bottom – Italians continue to hold on, despite their heavy casualties

 4th Spanish corps

General O’Donnell (Poor)
7 Command Points
Orders– Engage
Artillery fire on 6th Italian (total 8 – one casualty)
6th Italian test morale for fourth casualty (total 1 – fail become shaken)
15th brigade retreat 6”
16th brigade advance 6”
15th brigade test morale for rout (total 1 - fail continue to rout)
14th brigade test morale for shaken (total 0 – fail and rout)
16th brigade test morale for rout within 4”(total 3 – pass remain formed)

16th Italian corps
General Severoli (Poor)
8 Command Points
Orders – Engage
Severoli changed orders to Hold Mora
Artillery fire on 13th Spanish (total 7 – no casualties)
6th brigade test morale for shaken (total 1 – fail remain shaken)
Game Notes
Despite heavy casualties all of the Italian brigades are still holding on
Its starting to look like a victory for Severoli
O’Donnell has lost two brigades in rout, including his best one
His artillery continue to cause casualties, but somehow the Italians fail to break
Wargame rules can be found at

Monday, April 9, 2012

Battle of Mora – Move 7

1400-1500 13 August 1813

  Table at the start of move 7
Top – Spanish advance towards Mora
Bottom – Italian wait for the Spanish attack

  4th Spanish corps

General O’Donnell (Poor)
7 Command Points
Orders – Move to Mora
O’Donnell changed corps orders to Engage
Artillery fire on 6th Italian (total 9 – one casualty)
6th Italian test morale for third casualty (total 4 – pass remain formed)
15th brigade advance 6”
O’Donnell moves within command range of 15th brigade
15th brigade skirmish 8th Italian (total 3 – no casualties”

16th Italian corps

General Severoli (Poor)
8 Command Points
Orders – Hold Mora
Severoli changes corps orders to Engage
Artillery fire at close range on 14th Spanish (total 12 – two casualties)
14th Spanish test morale for third casualty (total 1 – fail become shaken)
Severoli moves to command range of 8th brigade
8th brigade advance to musket range of 15th Spanish
8th Italian and 15th Spanish exchange volley fire, Italians win (total 10)
15th Spanish lose three casualties and rout
8th Italian lose one casualty and stand firm

Game Notes
The dice gods seem to be smiling on both the Italians
6th brigade received third casualty, but passed morale by rolling a 6
The gunners rolled 2xD6 when firing at close range and inflicted two casualties

Despite the loss of one brigade in rout, the Spanish could still easily win this battle if they can do some more damage with their artillery

The Italians were fortunate that the brigade with the least casualties was in the right place to volley fire on the leading Spanish brigade.

Severoli had to change his orders from Hold to Engage in order to move forward and volley with the Spanish.   On Hold he would have had to wait until the enemy advanced close enough for him to fire.

Wargame rules can be found at

Sunday, April 8, 2012

Battle of Mora – Move 6

1300-1400 13 August 1813
  Table at the start of move 6
Top – Spanish guerrilla brigade arrive
Bottom – Italian cavalry have retired nearer to Mora

  4th Spanish corps
General O’Donnell (Poor)
7 Command Points
Orders – Move to Mora
Artillery fire on cavalry, who are out of the angle of fire
13th brigade advance 2” in square
Artillery manhandle 2” forward
14th and 15th brigade advance 6”
16th brigade advance 8”
O’Donnell moves to centre of corps

  16th Italian corps
General Severoli (Poor)
8 Command Points
Orders – Hold Mora
Artillery fire close range on 14th Spanish (total 6 – one casualty)
14th Spanish test morale for first casualty (total 6 – pass remain formed)
Game Notes
The only way the Italians can hope to win this battle is to inflict casualties at long range with their artillery, and hope that the poor quality Spanish infantry will fail their morale.
The French gunners achieved a hit, but unfortunately on the best of the four Spanish brigades – when then rolled a good dice for their morale test.
If the Spanish can cause even slight casualties it is likely that the French, who have previous battle casualties, will also fail their morale.   If one brigade breaks it is very likely that the rout will spread.
The Spanish infantry are almost within musket range, and if they can survive one more round of artillery fire should be able to close with the French infantry
Wargame rules can be found at

Saturday, April 7, 2012

Battle of Mora – Move 5

1200-1300 13 August 1813
  Table at the start of move 5
Top – Spanish deployment is now complete
Bottom – Italian infantry have retired closer to Mora

  4th Spanish corps
General O’Donnell (Poor)
6 Command Points
Orders – Move to Mora
Artillery fire on French gunners (total 7 – no casualties)
Artillery manhandle forwards 2”
13th brigade advance 2” in square
16th brigade arrive and advance 24”

16th Italian corps
General Severoli (Poor)
6 Command Points
Orders – Hold Mora
Artillery fire on 13th Spanish square (total 10 – one casualty)
13th Spanish test morale for first casualty (total 4 – pass morale remain formed)
Cavalry retire 7” facing enemy
Severoli moves to centre of corps
Game Notes
Spanish reserve brigade arrive on table on Lerida
Although out of command range they can move direct to corps along road
The corps commander has to use CP for this movement
Because there are no enemy nearer than 16” this brigade can treble movement rate
Wargame rules can be found at

Friday, April 6, 2012

Battle of Mora – Move 4

1100-1200 13 August 1813
  Table at the start of move 4
Top - 4th Spanish corps complete their deployment out of artillery range
Bottom – Italian hold their ground in front of Mora

  16th Italian corps
General Severoli (Poor)
6 Command Points
Orders – Hold Mora
Artillery fire on Spanish gunners (total 5 – no casualties)
6th and 8th brigade retreat 2” facing enemy

4th Spanish corps
General O’Donnell (Poor)
7 Command Points
Orders – Move to Mora
16th brigade advance 2” in square
Artillery manhandle 2” forward
14th and 15th brigade advance 6”
O’Donnell moves to centre of corps

Game Notes
It costs two CP per brigade to retire facing the enemy
Rule 3 covers Command Points
 
Wargame rules can be found at

Thursday, April 5, 2012

Battle of Mora – Move 3

1000-1100 13 August 1813
  Table at the start of move 2
Top - 4th Spanish corps deploy out of artillery range
Bottom – Italian hold their ground in front of Mora

  4th Spanish corps
General O’Donnell (Poor)
7 Command Points
Orders – Move to Mora
13th brigade form square
Artillery manhandle forward 2”
14th brigade advance 6”
15th brigade advance 8” and form column of attack

16th Italian corps
General Severoli (Poor)
7 Command Points
Orders – Hold Mora
Artillery fire on 14th Spanish (out of range – no casualties)

Game Notes
Italian artillery fired but Spanish out of range
We do not allow measuring range except when firing

Rule 7 covers artillery fire

Wargame rules can be found at

Wednesday, April 4, 2012

Battle of Mora – Move 2

0900-1000 13 August 1813

  Table at the start of move 1

Top - 4th Spanish corps have started to deploy either side of the Torrente-Mora road
Bottom – Italian cavalry move forward on flank, infantry form line

  16th Italian corps
General Severoli (Poor)
7 Command Points
Orders – Hold Mora
Severoli changes orders to Hold Mora

4th Spanish corps

General O’Donnell (Poor)
7 Command Points
Orders – Move to Mora
13th brigade advance 6”
Artillery advance 4” and unlimber
14th brigade advance 8” and form column of attack
15th brigade advance 8”
O’Donnell moves to centre of corps

Game Notes
Severoli has completed his change of deployment and changed his orders back to Hold Mora.  
The Spanish are out of artillery range, so he does not issue any further order
14th Spanish brigade can make multiple moves because they are more than 16” from the nearest enemy

Rule 5 covers multiple moves
Rule 7 covers artillery fire

Wargame rules can be found at
http://napoleonicwargamerules.blogspot.com

Tuesday, April 3, 2012

Battle of Mora – Move 1

0800-0900 13 August 1813

  Table at the start of move 1
Top - 4th Spanish corps approach on Torrente-Mora road
Bottom – 16th Italian corps deployed in front of Mora
 4th Spanish corps

General O’Donnell (Poor)
6 Command Points
Orders – Move to Mora
13th brigade advance 8” and form column of attack
Artillery advance 8”
14th brigade advance 8”
O’Donnell moves to centre of corps
15th brigade advance 8”
16th Italian corps

General Severoli (Poor)
7 Command Points
Orders – Hold Mora
Severoli changes orders to Move
Cavalry advance 12” towards woods
1st and 2nd brigades form line from column of attack
Severoli moves within command range (8”) of cavalry

Game Notes
Severoli had to change his orders to Move his cavalry forward to threaten the left flank of the approaching Spanish infantry.

On Hold orders they may not advance beyond the corps main battle line

Rule 4 explains corps orders

Wargame rules can be found at

Monday, April 2, 2012

Battle of Mora – Set Up

  strategic map  at 0800 13 August 1813
Campaign Background
16th Italian corps has been retreating for three days since the battle of Torrente.   For all of that period 4th Spanish corps have been in pursuit, so the Italians have not had any opportunity to rest and recover their battle casualties.

They also lost their supply depot at Torrente, and have been on half rations since Torrente.   As a result have started to lose more casualties due to lack of supplies.
General Severoli has ordered a halt at Mora in order to establish a supply depot, and to give his corps a chance to rest.  

4th Spanish corps are at full strength, though one of their brigades are one march behind having established their supply depot at Lerida.  

  tactical map at 0800 13 August 1813
The battle will take place in the nine squares outlined in white.  
General Severoli has deployed his corps just north of Mora

General O’Donnell is marching towards Mora from Lerida, where his 16th brigade has established the new supply depot.
  Wargames Table at start of battle
Mora is bottom centre on the cross roads

4th Spanish corps is approaching top centre

  16th Italian corps

All brigades are formed, but all have casualties as follows:

6th infantry brigade  - 2 casualties
7th infantry brigade  - 5 casualties
8th infantry brigade  -1 casualty
16th cavalry brigade  - 2 casualties
Corps artillery -  full strength

4th Spanish corps

Marching south on Torrente-Mora road in column of march


Special Rules
5th Italian infantry brigade is detached and not taking part in this battle

16th Spanish infantry brigade will arrive on the Torrente-Mora road at the start of move 5

We are play testing new rules for command and control.
Each commander rolls an average dice and adds the number of formed brigades under command
The wargame rules can be found at

The latest entry is a draft of the new rules